Have you ever felt frustrated when using a mobile app because of any of the following reasons?
- It lacks simple quality of life features like filtering, searching, automating actions, etc.
- It is poorly optimized and it is extremely laggy. Or maybe it takes too long to load.
- It doesn’t show a lot of information on screen, since images and buttons have to be BIG for a mobile app. Or the complete opposite, the interactable elements are too small or don’t work well. The UX is terrible in both cases.
- It takes up too much space on the phone’s storage.
If you can relate with any of those reasons, I’m right there with you. You could ditch that application, but if you really want to use it, I’ve got good news: there is a way around it. It involves learning about cyber-security, reverse engineering an API and automating nearly anything that matters in an app.
Overview
Summary: We will perform a MITM attack by installing a custom CA in an Android emulator and scripting the API requests we intercept. If you understand that, go to the next section already.
Normally we can’t see the traffic coming out of an App. It’s encrypted, and therefore it looks like random garbage to us. This keeps your information safe, at least during the transaction (what each ends does with the information and how they protect it is a different matter).
You might have heard about digital certificates. They are what make this encryption possible, and in order to know what certificates you can trust or not your devices depend on a Certificate Authority (CA). These are actors that can create digital certificates
But anyone can be a CA, or they can create one at least, so how do we know which CAs can we trust or not? Usually, your devices/applications come with a hardcoded set of CAs they trust by default. This is a good enough measure that mostly works, although these CAs then become very high value targets for hackers and you can believe some have been compromised before.
So, back to our little project. We want to be able to snoop into what our target app and their backend are talking about. In order to do that, we are going to force an Android emulator into sending all its network traffic through us and then make it think it can trust us. How we will do that is by installing our own certificate as one of those default CAs. This way, we will be able to understand the encrypted HTTPS messages any app sends and receives. This is what is known as a “Man in the Middle attack” (MITM) in cyber-security.

When we are able to understand what app and backend are saying to each other, we will begin investigating the now exposed API. If we’re lucky, we might even have the chance to automate our daily app usage into a script. That way we won’t even have to open the app again.
This post will be split in 3 parts:
Setting up emulator and app
Install the tools
If you don’t have the Android platform tools, we will install them now. I’m using Arch, so I will use these AUR packages:
You can install them like:
git clone https://aur.archlinux.org/android-sdk.git
cd android-sdk
makepkg -si
cd ..
git clone https://aur.archlinux.org/android-sdk-platform-tools.git
cd android-sdk-platform-tools
makepkg -si
It shouldn’t be too difficult to find out how to install them on another platform. For instance, if you’re on Ubuntu, you can just do:
sudo apt update && sudo apt install android-sdkOn Mac (assuming you have Brew installed):
brew tap caskroom/cask
brew cask install android-sdk
Install the system image
Once we have the tools we need, we can download the system image. Since we want to download an app from the Play Store, we will need that the image we use includes the Google API. We want to find a an image containing “google_apis”, but not “google_apis_playstore”. Why not get the one that comes with the Play Store pre-installed, you ask? Well, those are production builds and we won’t be able to root them. We will need rooting our emulator later.
I chose the “android-25” one, but you can choose another one if you want.
sdkmanager --list | grep "google_apis" #select another image from this list if you want
sudo sdkmanager --install "system-images;android-25;google_apis;x86_64"
Create the AVD
After accepting the license and waiting for the download to finish, we can finally create our AVD.
avdmanager create avd --name "mitm-emulator" --package "system-images;android-25;google_apis;x86_64"And open it with:
emulator -avd mitm-emulator &Installing Google Play
Download Open GApps for your system image from https://opengapps.org/. We will need them to download the target app from the Play Store. We can extract it with:
unzip open_gapps-*.zip 'Core/*'
rm Core/setup*
lzip -d Core/*.lz
for f in $(ls Core/*.tar); do
  tar -x --strip-components 2 -f $f
done
Then, we run our emulator and install the packages:
emulator -avd "mitm-emulator" -writable-system &Wait for the loading to finish. As soon as the home screen is shown, copy the Open GApps folders to your system.
adb root
adb remount
adb push etc /system
adb push framework /system
adb push app /system
adb push priv-app /system
We can now restart the emulator.
adb shell stop
adb shell start
After the loading finishes, you will see the Play Store in your home screen.
Install the target app
This should be the easiest step. Just log into the Play Store and download the target app.
Make sure you can open it before proceeding.
Setting up the proxy
Install MITM proxy
Now we will install and configure our proxy. We will be using mitmproxy, an MIT licensed open source tool built just for MITM attacks.
It can easily be installed from Arch’s official repositories with:
pacman -Sy mitmproxyIt seems on Ubuntu you will need to install pip and then install mitmproxy using it.
sudo apt install python3-pip
sudo pip3 install mitmproxy
On Mac, just use Brew again:
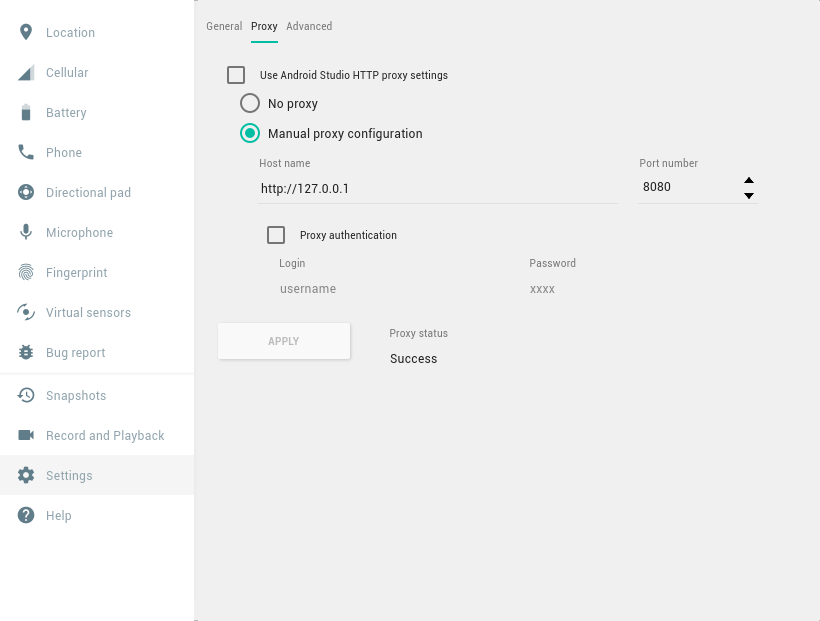
brew install mitmproxyTo test it out, let’s start the emulator and open its settings by
clicking on the 3 dots button. Then, navigate to the
settings section, select the Proxy tab
and configure it to use http://127.0.0.1:8080 as a proxy,
like in the image below.

Run mitmproxy listening in 127.0.0.1:8080 in a terminal, like this:
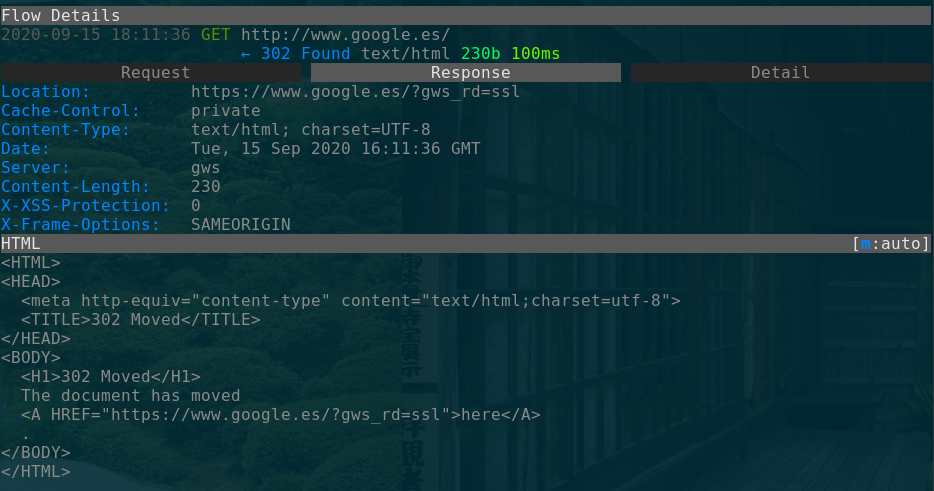
mitmproxy --listen-host 127.0.0.1 --listen-port 8080We can now go back to the emulator and navigate anywhere. You will see it’s almost as if your device lost connection, and if you try to use a web browser, a warning about your connection not being private will appear.

This happens because mitmproxy signs HTTPS traffic with its own certificate. Since the emulator doesn’t trust that certificate (yet), it won’t even accept that response! If you go to the terminal where you launched mitmproxy, you should see something like this. Notice all the traffic is HTTP, there are no HTTPS messages.


To continue, we will need to make the emulator trust mitmproxy’s Certificate Authority.
Install the Certificate Authority
The way mitmproxy works is it has its own Certificate Authority. It uses it to generate certificates on the fly for whatever external resource the emulator asks for. It then uses those certificates to encrypt the messages sent to it, making it seem like the emulator is talking with the real server. In reality, though, it is decrypting and encrypting all the messages with its own certificates, so it knows everything the client and server are talking about. And neither of them knows it is spying on them.
If you read the documentation for mitmproxy you will see there are
official instructions on how to install the certificate on mobile
devices: you visit “mitm.it” in the browser, download the
certificate and install it. Then you can see decrypted HTTPS traffic in
mitmproxy… but just the traffic generated by the browser.
If we want to read HTTPS traffic from native apps, we need to install it as a system certificate. We will need root privileges for that, so we will launch the emulator specifying:
emulator -avd mitm-emulator -writable-system &
adb root
adb remount
Now we need to find our certificate file. If you are using Linux, it
will be in the ~/.mitmproxy/ folder. Let’s save it to a
variable named “CA”:
CA=~/.mitmproxy/mitmproxy-ca-cert.pemWe just need to copy that file into the emulator’s trusted CAs folder, but it needs to be named with a special value. The filename must be the hash of the certificate itself. You can calculate it with the following command:
HASH=$(openssl x509 -noout -subject_hash_old -in "$CA")But since mitmproxy uses the same default certificate everywhere, we
know the value should be c8750f0d, so you can skip this
step and just use that value. You can always come back and use the
previous line to recalculate the value if it doesn’t work 😛
So you can just do:
adb push "$CA" /system/etc/security/cacerts/c8750f0d.0If you try to load a website now, it should load correctly and you should see traffic being detected by mitmproxy. Moreover, if you try to open the target app, you should see its traffic too! Congratulations!
Don’t forget to unroot the device before you continue.
adb unrootExploitation
Investigating the API
To begin, let’s just use the app normally. Create an account with username and password (avoid authenticating with Google or Facebook for now, you don’t want to have to deal with OAuth). Log in, search and browse some items… We just want to generate some traffic so that we can inspect it later.
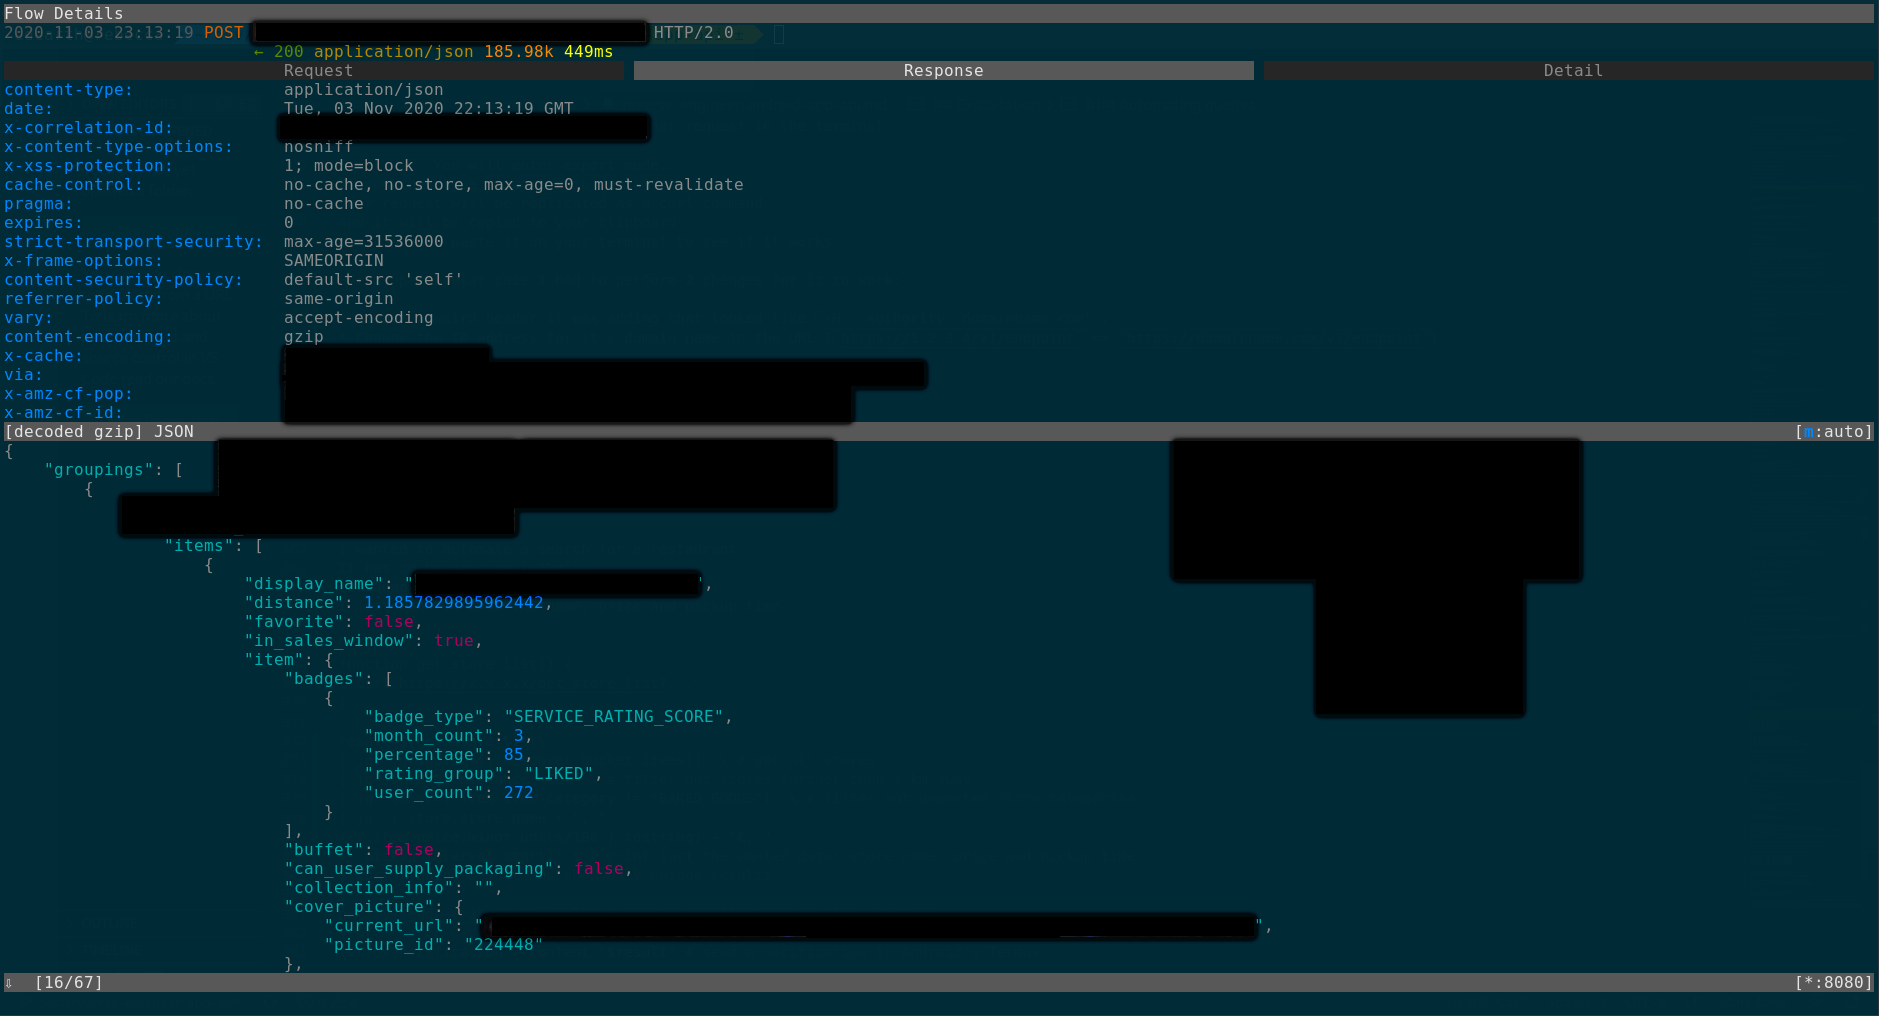
Now we can go back to our terminal and check the messages mitmproxy caught. We have to locate the traffic from the target app. To do so, just browse the captured requests list and see if any URL matches the app’s domain. Alternatively, you could look for endpoints that match actions you performed (like a login, search, etc.).
If you’re lucky, your target API will use a human-readable document format like JSON or XML, instead of protobuf. We are lucky and our target uses JSON.

This means we can easily replicate that request in the terminal.
In the terminal running mitmproxy, enter w. You will
enter export mode. If you then type
export.clip curl @focus, your request will be replicated as
a curl command and it will be copied to your clipboard. You can then
paste it on your terminal to see if it works.
For my particular case I had to make 2 changes for it to work:
- Remove the
:authoritypseudo-header that looked like-H ':authority: domainname.com'. - Change the IP address for it’s domain name in the URL
(
https://1.2.3.4/v1/endpoint=>https://domainname.com/v1/endpoint).
Automating queries
From this point on, it’s just a matter of exploring and seeing what can you do with the endpoints you discover. It’s just like learning any regular new API.
For example, I wanted to automate a search for a restaurant. It has to be near me (<1km), it cannot be a bakery and I just want to know the name, price and pickup time.
function get_store_list() {
  curl https://x.x.x.x/get_store_list?...
}

result=$(get_store_list
| jq '.groupings[].items[]' \ # get all stores
| jq 'select(.distance < 1)' \ # filter out stores further than 1 km away
| jq 'select(.item.item_category != "BAKED_GOODS")' \ # filter out unwanted store categories
| jq '(.store.store_name + ", "
+ (.item.price.minor_units/100 | tostring) + "€, "
+ .pickup_interval.start)' \ # print just the wanted data: store name, price and pickup time
| sort | uniq) # sort and show only unique results

notify-send -t 30000 "$result" # send a notification in Linux desktop
# or
termux-notification --content "$result" # send a notification in Android's Termux
This shows a simple list like this one as a notification:
"Store name 1, 3.99€, 2020-11-04T19:00:00Z"
"Store name 2, 4.99€, 2020-11-04T15:00:00Z"
"Store name 3, 4.99€, 2020-11-04T15:00:00Z"
"Store name 4, 2.99€, 2020-11-04T19:00:00Z"
...
It can be then saved as a script and run as a cron job everyday at certain time (lunchtime?). This will notify me about available stores to get food from.
Do once. Run forever. Ok, run until the API changes or something breaks, but still, it’s less worrisome than opening the app and searching manually.
Links of interest
If you want to know more about this topic, I encourage you to follow these links and search for more information.
